Showing posts with label Scrappy Moms Stamps. Show all posts

Saturday, February 24, 2018

Party Present Birthday Card

Happy Saturday Crafters,

Today I'm sharing a birthday card I made KaDoodle Bug Designs Shoptastic Cuties - Party Present Cutie file.   I used the the jpg file to print and cut this present out with my Silhouette Cameo.  Accented with Wink of Stella glitter pens and Gelly Roll pens.


Of course I had to put this little cutie on a action wobble.


Card Recipe:
  • A2 Card
  • KaDoodle Bug Designs Shoptastic Cuties - Party Present Cutie file. 
  • Papers from DCWV The Sweet Mat Stack 4.5"x6.5" & Recolections Cheeky Modern Pop 6"x6" paper pad
  • Sentiment from Scrappy Mom Stamps 
  • Circles cut with The Stamps of Life - Sizzix Circle Frames dotted
  • Ribbon from The Stamps of Life
  • Lollipop, candy and gum drop brads from my craft stash.
  • Gem in center of bow from The Stamps of Life
  • Wink of Stella Glitter pens
  • Blue Gelly Roll pen
  • Action wobble
Thanks for stopping by.
Hope you liked my birthday card.

Happy Crafting!
TTFN,
Debby 

Friday, October 13, 2017

Roaring Birthday Card

Happy Friday Crafters,

Today I'm sharing with you a roaring fun birthday card.

I used the lion from KaDoodle Bug Designs Cute Zoo Crew, dies from Lawn Fawn and a sentiment from Scrappy Moms Stamps. 


Card Recipe:
  • Card Base 5-1/2"x5-1/2"
  • KaDoodle Bug Designs Cute Zoo Crew
    • Accented the pieces with my Copic YR24 marker
  • Lawn Fawn Grassy Hillside Borders
    • Accented with my eBrush using Copic makers E13 & E33
  • Sentiment from Scrappy Moms Stamps Zodiac Cuties stamp set.
    • Sorry Scrappy Moms Stamps closed shop.  You might be able to find their stamps on eBay or on a Facebook Group that sells gently used crafting items. 
Thanks for stopping by.
Happy Crafting!
TTFN,
Debby 


Friday, August 25, 2017

Panda Baby Card

Happy Friday Crafters,

Today I'm sharing a baby card I made using the panda in the crib jpg from the KaDoodle Bug Designs Cutie KaTootles Baby Girl Panda file.

The card base was modified so I could incorporate the panda in the crib jpg instead of the rocking horse that was included in the file I bought on the Silhouette Design store.   The blocks were made using the KaDoodle Bug Designs Cutie KaTootles Baby Block Panda file and instead of BABY I used a font to cut out the name of the baby girl to make it more personal for my friend's daughter and her baby girl BRIA.  

Ready for some pictures?  
Well here you go...

Here is the card closed.

Close up!
Isn't this baby panda girl precious?


Looking from the top down. 


Here is it opened.


 Here's a print shot of my Silhouette Design software screen.  
At the bottom in blue you'll see the original piece that came with the card file.  I used my software to crop away the horse, see uncolored piece below that.  Once I cropped away the horse I put the jpg piece onto this piece and after i got it placed when I wanted it and then I welded the two pieces together.   The bottom pink piece is what it looked liked when I was done. 


Card Recipe:


  • KaDoodle Bug Designs Cutie KaToodles Baby Block Panda
    • Used the blocks from this file and then used a font in my Silhouette software to create the baby's name to put on the blocks.

  • Card Base -- Pop up Box Card Baby Rocking Horse by Lori Whitlock - Design #157483
    • MODIFED as shown in picture above
    • Here is a picture of what this card was originally designed to look like.

  • Sentiment from Scrappy Moms Stamps Writing on the Wall stamp set.
Hope I inspired you to take files and modify them to make anything you choose to make.

Thanks for stopping by.
Happy Crafting!
TTFN,
Debby 


Friday, August 4, 2017

Hunting Birthday Card

Happy Friday Crafters,

Today I'm sharing with you a birthday card I made for a friend who likes to hunt and I was so happy that he really like it. 

I didn't want to put a sentiment on the outside because I felt it would take away from the scene. 

Here's a close up of that cute little hunter.


Card Recipe:
  • Card base 5-1/2"x5-1/2"
  • Deer scene background from the silhouette store -- Design #120641
  • Gun Hunter is from Cuddly Cute Designs 
    • Used my Silhouette Cameo software to fill in the hunters clothes with camo digital paper I purchased from the Silhouette Store.  It's called Hunting Design #47950.
      • Used my Copic Marker E33 Sand to edge the camo pieces. 
  • White Gelly roll pen for accents
  • Sentiment on inside is from Scrappy Mom Stamps Great Outdoors stamp set.
Thanks for stopping by.
I hope you love this card as much as I do.

Happy Crafting!
TTFN,
Debby 

Entering in the following challenges:

  • CARDZ TV CARD CRAZY CRAFTERS ANYTHING GOES CHALLENGE #7
    • http://cardztv.blogspot.com/2017/08/cardz-tv-card-crazy-crafters-anything.html
  • Pennys Challenges #340 Anything Goes 
    • http://pennyschallenges.blogspot.com/2017/08/welcome-to-pennys-challenge-340.html
  • Craftaholics R Us Challenge #30 Die Cuts
    • https://craftaholicsrus.blogspot.com/2017/08/challenge-30-die-cuts.html
  • Let's Craft and Create Challenge #128 Hey Dude
    • http://letscreatechallenges.blogspot.co.uk/2017/08/challenge-128-hey-dude-winners-of.html


Tuesday, July 25, 2017

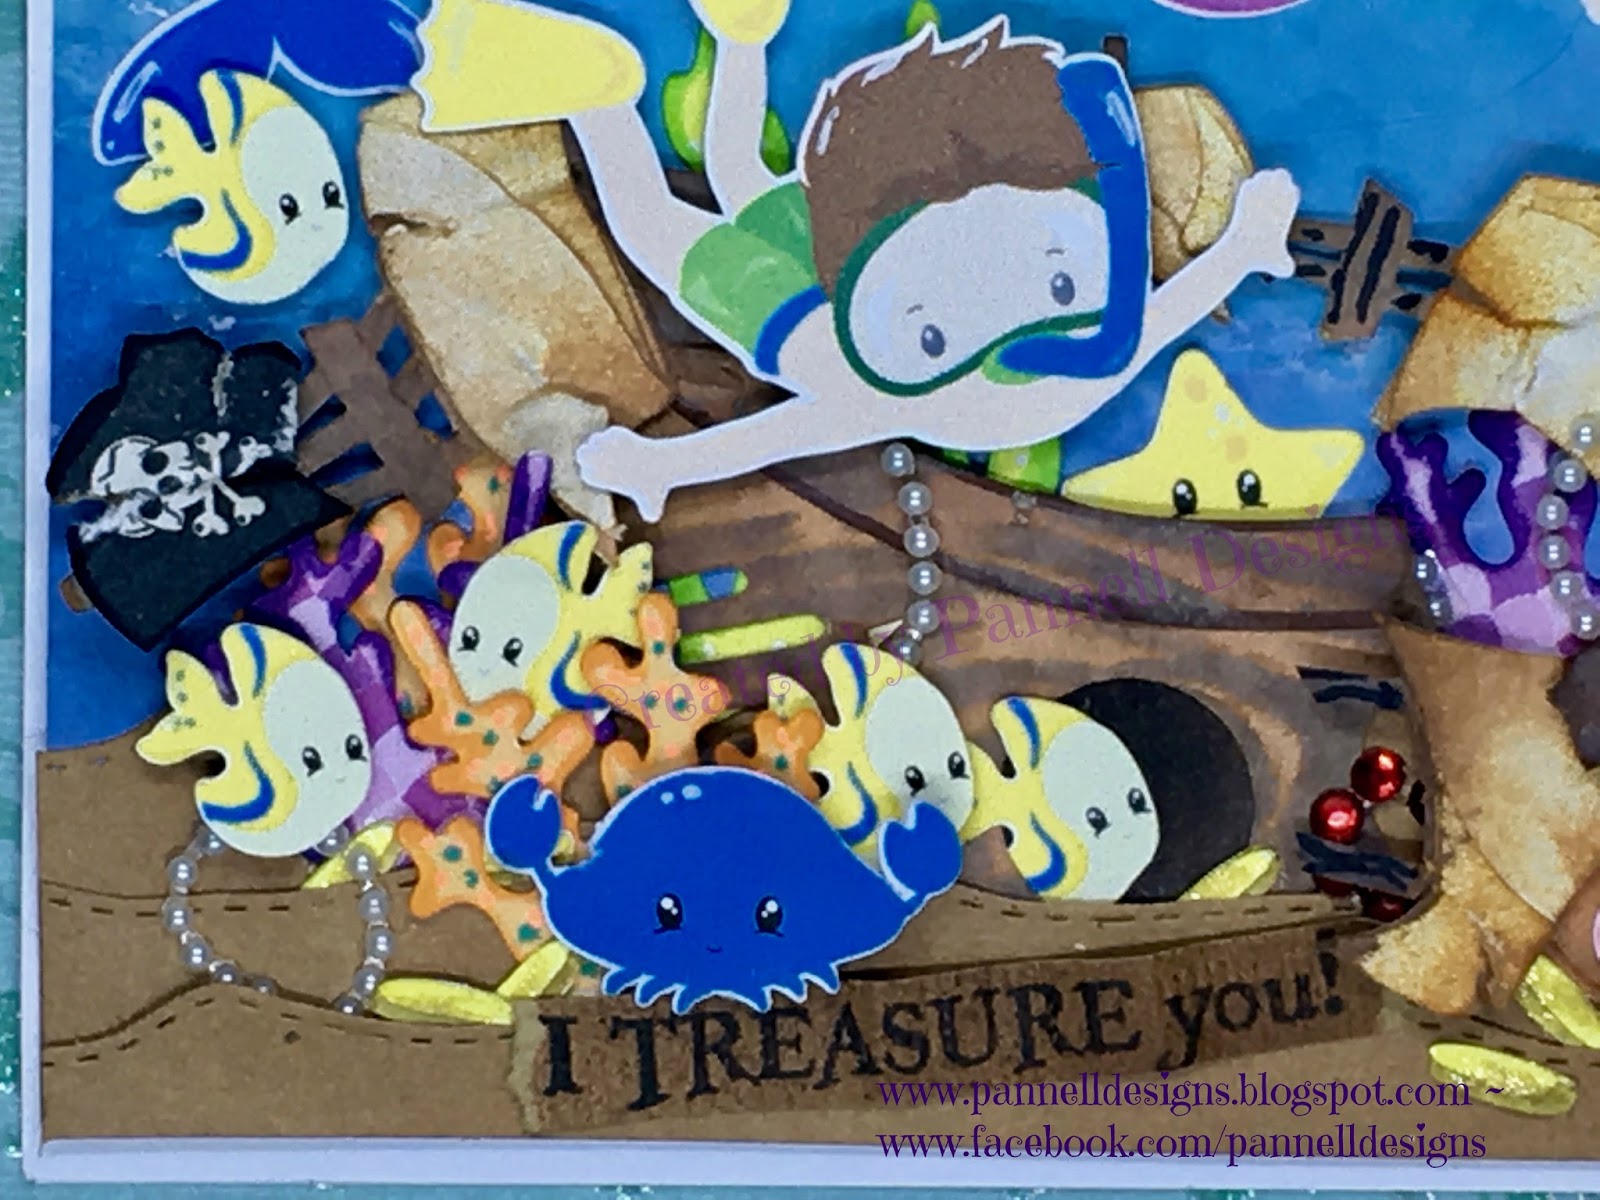
I Treasure You - Under the Sea Sunken Pirate Ship

Happy Tuesday Crafters,

I'm super blessed and excited to be this week's Guest Designer for Die Cuttin Divas.


This week's Die Cuttin Diva's Challenge is Under the Sea.

I have been seeing all kinds of beautiful sea related projects by crafters and I was overwhelmed by their beauty and their creativeness so I had my work cut out for me.   One of the things I haven't seen was an underwater scene with a sunken ship so I started searching for the the right images for my under water scene.

I found a pirate ship in my SVG data base by Miss Kate Cuttables that I felt would be perfect for the sunken ship.    I wanted snorkelers/scuba divers in my scene but unfortunately I didn't have any in my SVG arsenal so I went to the internet to search which brought me to the Prettygrafik website.   They had a boy and girl clipart sets that included a bunch of images that would be perfect for the design I had in my head so I bought them and the designing began.    

I put the card mat size on my Silhouette Design Software screen so I could size the pirate ship, all the sea critters and snorkelers.    Once I did that I printed and then cut them all out.

I used the Tim Holtz Distress Oxide Broken China and Faded Jeans ink to make the ocean water.

I used Tim Holtz Distress Oxide Vintage Photo and Stampin Up Early Expresso to give the pirate ship character and then I ripped it in half.  I used Tim Holtz Distress Ink Tea Dye to dirty up the sails and then I ripped them and the pirate flags.  A sunken ship has to look damage after all.   


Card Recipe:
  • Sentiment from Scrappy Mom Stamps Designer's Choice stamp set
  • Tim Holtz Distress Oxide
    • Sky - Broken China & Faded Jeans
    • Ship - Vintage Photo
  • Stanpin Up Early Espresso ink also used on ship
  • White Gelly Roll Pen
  • Pearls and gems from my craft stash
Thanks for stopping by. 

Hope you join Die Cuttin Diva's in this Under the Sea challenge.   
Link up your project on their blog www.diecuttindivas.blogspot.com

Happy Crafting!
TTFN,
Debby


Wednesday, July 19, 2017

Everything is S'more fun with you! Camping Card

Happy Wednesday Crafters,

I'm super blessed to be a Guest Designer again for Sunny Day Crafting.


Today Starts their C is for Camping Challenge.

I used three different files from KaDoodle Bug Designs to create my card.  
Here's a picture of my Silhouette Design Studio Screen showing you how I put the images to print and then cut them out. 


For the Sky I used the new Tim Holtz Distress Oxide Ink pads.
I've been watching YouTube Videos to learn how to use them better but I'm still learning and will continue to watch to learn new techniques. 

Here is my finished card.  
Didn't want to take away from the scene so I just used the sentiment I put on the inside. 


Here's a close up of those cute camping skunks.


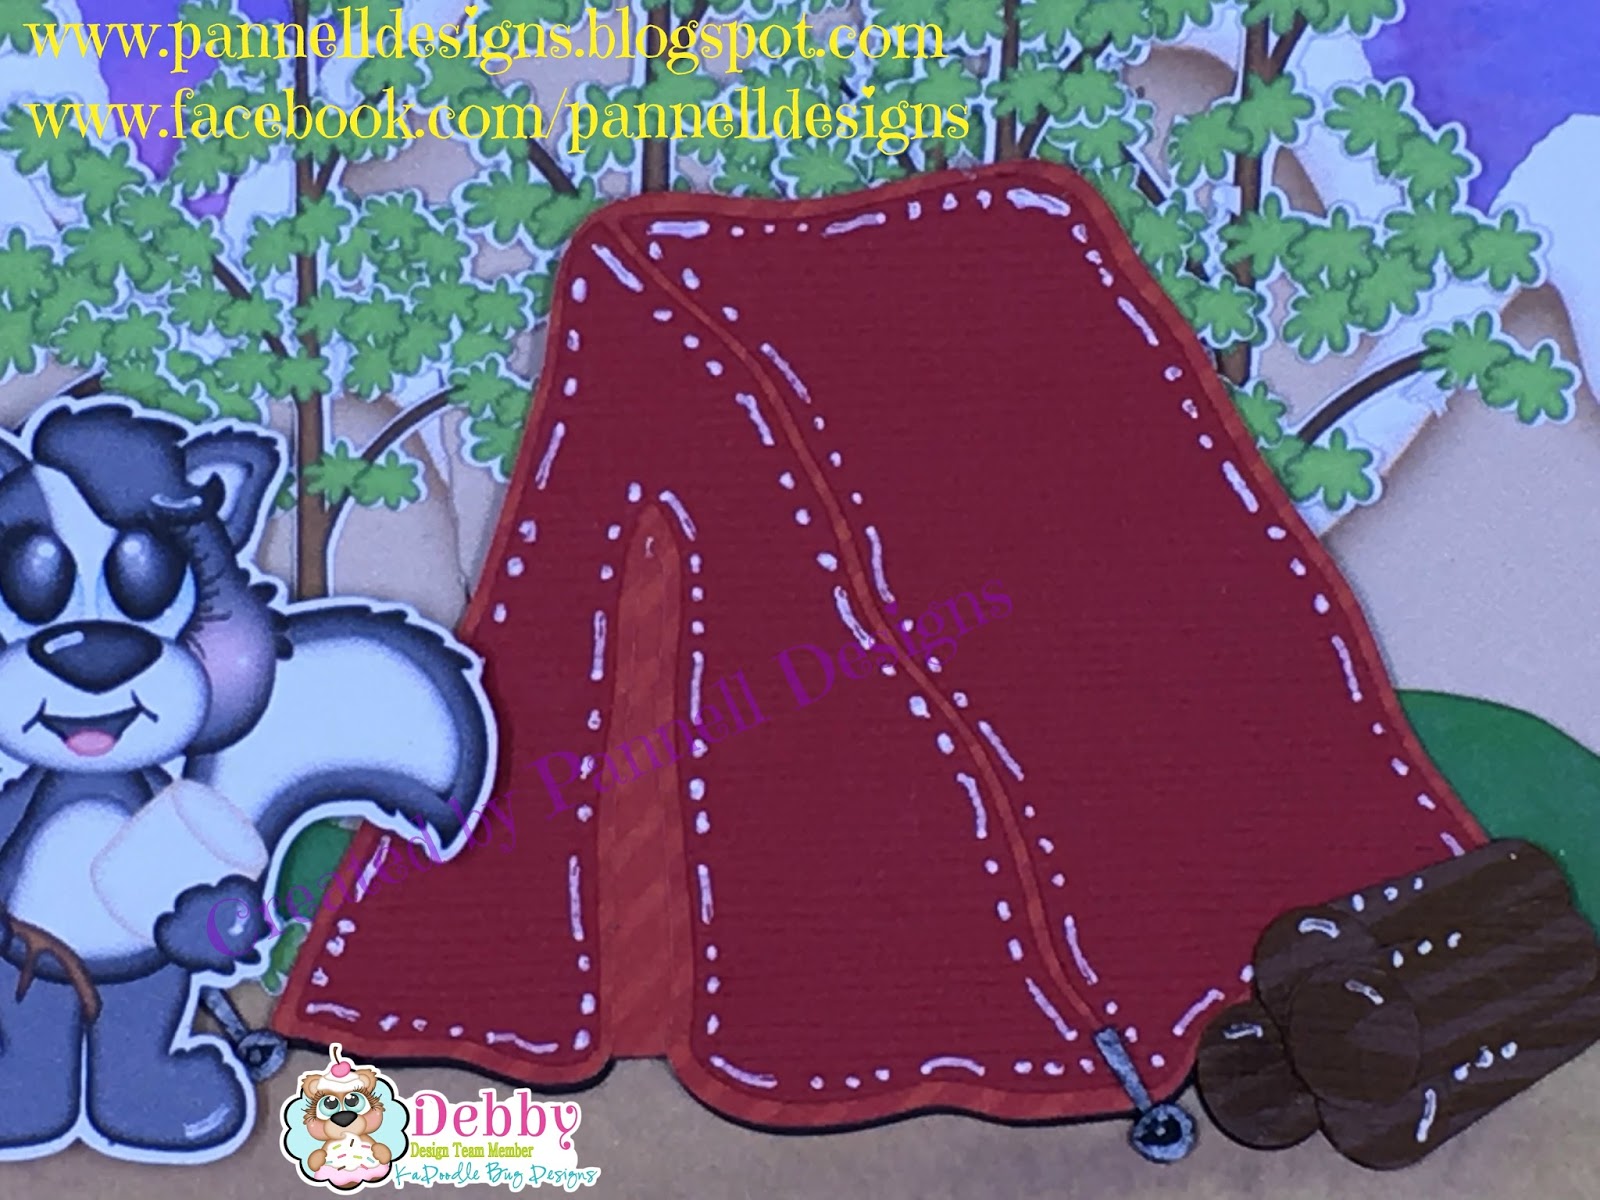
Close up of the tent. 
Cut the pieces out on this one because I wanted the tent to be red not blue as it would've been if I used the jpg of the tent. 


Here's the the sentiment I chose to put on the inside of this card. 


Card Recipe:
  • KaDoodle Bug Designs Wilderness Trail
    • Used the Mountain and Tree from this file
      • Took the bottom of the mountain from the SVG File.  Filled it with the color of the printed mountain, stretched it to make it wider so I could use it as the dirt for the campground.   After I printed it out, I used the Tim Holtz Distress Oxide Vintage photo to give it some texture.  Put some of the ink on a craft mat, sprayed with water and then dragged it through the ink on the craft mat. 
  • KaDoodle Bug Designs Roasting S'mores Skunks
    • Used the Skunks and Fire from this file
      • Fire accented with Wink of Stella Brush Clear Glitter Pen
  • Ka Doodle Bug Designs S'more Love
    • Used the Tent from this file
      • Stakes colored over with Office Max Silver Metallic Marker
  • Sentiment from Scrappy Moms Stamps Great Outdoors stamp set.
  • White Gelly Roll Pen 
  • Sky made with Tim Holtz Distress Oxide Faded Jeans, Worn Lipstick & Wilted Violet inks
I enjoyed seeing everyone's creations for last weeks B is for Beach Challenge and I'm looking forward to seeing what you create for the C is for Camping Challenge that starts today.  Click HERE to go to the Sunny Day Crafting blog to link up your project. 

Thanks for Stopping by.
Happy Crafting!
TTFN,
Debby 


Friday, July 7, 2017

Owl Graduation Card

Happy Friday Crafters,

Today I would like to share with you a graduation card I made for my bestie at work's grandson who was graduating from Preschool.   

His group was the Owl Group so I knew the KaDoodle Bug Designs Cutie KaToodles Graduation Owl would be the perfect image for his graduation card.   

For the base of the card I used the 3D Popup Gift Card Holder by Lori Whitlock because she was giving him a gift card and I wanted to make it fun for him.

I used Jaded Blossom Banner Dies to make the banners and cut the letters out to fit on the banners using my Silhouette Cameo.


When you open the card you see the gift card holder pop up.
Wasn't sure where to put the sentiment and since the card was already put together I stamped it on a a square.  I was thinking of putting it on the blue pop up gift card holder so I rounded the corners but I didn't like it there so I  placed it on the top of the inside panel of the card.


Card Recipe:
  • Card Base - 3D Popup Gift Card Holder Card by Lori Whitlock purchased from the Silhouette Design store -- Design #39264
    • Watched her YouTube video to help my put it together.  Click HERE to go to that video.
  • All colored/pattern paper from Die Cuts with a View (DCWV) 8"x8" The Education Stack


  • Sentiment on inside of card from Scrappy Mom Stamps Critter Crazy stamp set.
    • Sorry Scrappy Mom Stamps is no longer in business.  :(
Thanks for stopping by.
Happy Crafting!
TTFN,
Debby 


Friday, June 2, 2017

Light the Candles Birthday Card

Happy Friday Crafters,

Today starts the PDE Linky Party #175 Anything Goes or Optional Theme "Color It".

For this challenge I'm sharing a birthday card I made the Art Impressions Fire Out Stamp Set.   I have to tell you that I get a good laugh at the Art Impressions stamps because they have some of the funniest characters.   Even though I'm not the best at coloring these stamp sets I'm still going to use them and try my best to make them look half way decent.    

I fell in love with this lady holding a fire extinguisher and had to buy the set.   I stamped her on white paper, colored her with various markers and then fussy cut her out.    I wanted her pointing at a cake filled with candles and found this picture of a lady holding a cake on fire that I thought would pair perfectly with her.   Used my Silhouette to print and cut it out using the nesting label - vertical cut file and to cut out red shadow for it.   I used the the same nesting label - vertical cut file to cut a white and blue mat to put behind the lady holding the fire extinguisher.   Stamped the blue mat with sentiments from Scrappy Moms Stamps Hooray for Birthdays. 


Card Recipe:
  • Art Impressions 4371 Fire Out Stamp set
    • Colored with various markers.   
    • "Okay! Light the Candles!" was printed and cut out using my Silhouette. 
  • Mats are from Silhouette Store - Nesting Label-Vertical Design #171517
  • Scrappy Moms Stamps Hooray for Birthdays Stamp set
  • Lady holding cake image from internet
  • Rik Rak Brads from my craft stash

I hope you share your project(s) with us over at the PDE Linky Party Blog.

Thanks for stopping by.
Happy Crafting!
TTFN,
Debby

Friday, April 7, 2017

Turtle Birthday Card

Hello Crafters,

Today starts the PDE Linky Party #167 Anything Goes Challenge.

For this challenge I'm sharing with you a birthday card I made utilizing my eBrush to accent some of the pieces.

The back layer of the shaped mat was white and I used my eBrush with my green sharpie to ink the edges.  I like the way it looks like grass. I also used the eBrush on my balloons with various colors of Sharpies and Comic markers.
I then took a second piece of the blue background and used it to help me make the sky using Stampin' Up Brilliant Blue ink and a sponge.   I also used the eBrush on my balloons. 

The turtle is from Miss Kate Cuttables.  I got him when he was a freebie but you can find him in her $.50 section.   Below in the Card Recipe you will find a link to the turtle.


Card Recipe:
  • A2 Card Base
  • Patterned rectangle mat from Studios Basics 101-Creative Imaginations Birthday Bliss 6"x6" Paper pad.
  • Miss Kate Cuttables Turtle
    • Face stamp is from Pink & Main Mini Faces Set 
    • Close to My Heart Liquid Glass for eye glasses

    • Shaped mats cut out with my Silhouette.
    • Sentiment from Scrappy Mom Stamps Make a Wish Set
    • Stampin' UP Brilliant Blue ink pad
    • eBrush and various Sharpies & Copic Markers
    Hope you liked my turtle birthday card and hope you join us for this #167 Anything Goes Challenge.  Click HERE to share your project with us. 

    Thanks for stopping by.
    Happy Crafting!
    TTFN,
    Debby

    Friday, February 10, 2017

    PDE Linky Party Friday Challenge - #159 Cards

    Happy Friday Crafters,

    Today starts the new PDE Linky Party Friday Challenge.
    This weeks challenge is my favorite cards.

    Back in 2015 SVG Cutting Files had a blog hop called Hakuna Matata Lion King Blog Hop where you were able to get free files by hopping along.   
    One of those files was the quirky Ed.  

    As I was scrolling though my files to figure out what I was going to design, I saw Ed and knew he would be fun to put on an age type birthday card.  
    In fact I fell in love with him I made two cards with him but slightly different. 

    For the first card I paired Ed up with the "Your Age Does Not Compute" sentiment from Jaded Blossom Robotastic stamp set.
    I thought it was perfect with the way he's tilting his head and still makes me laugh when I see it. 


    For the second card I paired Ed up with the "You're How Old?" sentiment from Scrappy Moms Stamps Whimsical Words Stamp set.  Doesn't he look mischievous asking someone how old they are?  HeHeHe...


    Card Recipe:

    • Ed from SVG Cutting Files Hakuna Matata Lion King 2015 Blog Hop 
      • This file is not available for sale.   Was only available during this blog hop.  Sorry.
    • Card One:
      • Card Base 5 1/2" x 5 1/2"
      • Yellow mat cut at 5 1/4" x 5 1/4"
      • Music Note pattern paper from Echo Park 6"x6" Fine and Dandy Paper Pad by Lori Whitlock cut at 5"x5"
      • Grass cut using Lawn Fawn grassy hillside metal dies boarders.
      • Sentiment from Jaded Blossom's Robotistic stamp set.
    • Card Two:
      • Card Base is from SVG Cutting Files - Posted Stamp card base that I resized to 5 1/2" x 5 1/2"
      • White mat cut at 4 3/4" x 4 3/4"
      • Green mat cut at 4 5/8" x 4 5/8"
      • Pattern paper cut at 4 1/2" x 4 1/2" and is from DCWV Glitter Sweet Mat Stack 4.5"x6.5"
      • Sentiment from Scrappy Moms Stamps Whimsical Words stamp set 
    I hope my cards made you smile and I hope you join us for the PDE Linky Party #159 Card challenge.   Click HERE to for the PDE Linky Party blog to link up your cards for this challenge.  

    Thanks for stopping by.
    Happy Crafting!
    TTFN,
    Debby