Friday, June 30, 2017

Beach Tiger Birthday Card

Happy Friday Crafters,

Today is a bittersweet day.  
The bitter part is that today is my last day as a PDE Linky Party Design Team.  The sweet part is that I get to share with you a cool summer themed card I made for the last challenge in June which is the #179 Summer Fun (Optional Fun Fold Card) Challenge and that I will join them in their challenges, which will probably be the cards and anything goes challenges because you know how hard it is for me to make tags and non-card projects.  :)   

For my card I started off a card base from SVG Cutting Files called Fancy Card Base Chunky and I used the Landscape one.  The card then was adorned with KaDoodle Bug Designs Sunning Tiger file, waves from a file I bought from the Silhouette Design Store, sand made with Jaded Blossom dies and a sentiment from Jaded Blossom.

Oh how I wish I was where this cool tiger is at.  Sitting in a beach chair on a nice sandy beach with my sunglasses on, listening to the waves crashing and not a care in the world.   


I also used some Jaded Blossom stamps for the inside of this card as well. 


Card Recipe:

Thanks for stopping by.

Can't wait to see what summer themed project you create and share with us over at the PDE Linky Party blog.

Happy Crafting!
TTFN,
Debby


Wednesday, June 28, 2017

Coffee Skunk Thanks a Latte Card

Happy Wednesday Crafty Friends,

Today I'm sharing with you a project I made with the cute KaDoodle Bug Designs Coffee Skunk file. Which by the way is available for free for a short period of time.  

KaDoodle Bug Designs is a Super Sponsor of the Coffee Loving Card Makers 2017 Summer Bloghop and I'll be entering this card on their blog.  


For today's card I chose to use the jpg from the Coffee Skunk file so I could quickly print and cut instead of the svg and putting together the pieces.    
I love that the KBD files have the jpg and svg files so you can use either one depending on what you want to do.  

I decided to create my own pattern paper using the sun from the KaDoodle Bug Designs Coffee Skunk file to tie into the sun on the coffee mug and the larger sun I stamped my sentiment on.  

Because I was using the print and cut feature in my Silhouette Design Software I grabbed the sun from the Coffee Skunk svg file and then I filled it with a gradient color.  After I got the yellow and orange how I wanted it, I reduced the sun and copied them in a row.  I group the row and copied and placed them where I wanted them.  I also made them hang over the edges of the blue rectangles so they would look like a random pattern when it was cut out.   

Here is a picture of what my screen looked like and on the right is the color window and the gradient panel to show you how I used this to fill in my sun. 


Here is another print shot showing you my cut lines. 


Here is my completed card.  
Used a couple of the coffee bean trios and a coffee bean paper piece from another coffee project to make a coffee bean bow on the upper right hand side of my card.    
Use the larger sun to stamp my sentiment from Jaded Blossom Stamps.  


Here's a close up.   
Don't know if you can see it but I printed and cut out a second Coffee Skunk and then fussy cut the skunk and beans away from the cup and then glued them on top of that area on the complete Coffee Skunk to give it some dimension.  Also used Gelly Roll pens to add some accents to the printed image to give him some dimension.    The I used pop dots to put him on my card and added a pop dot to another trio of coffee beans and added it to the bottom.  


Card Recipe:


This card will be entered in the Coffee Loving Card Makers 2017 Summer Bloghop and on their Instagram page using #summer2017clh

Hope you like my card and me showing you how I created my pattern paper.
Thanks for stopping by.

Happy Crafting!
TTFN,
Debby 


Friday, June 23, 2017

Summer Loving Coffee Blog Hop

Happy Friday Crafters,

Today is a special day.   

KaDoodle Bug Designs is a Super Sponsor of the Summer Coffee Lovers Blog hop and as a KaDoodle Bug Designs Design Team member I'm excited to share with you two coffee related cards I created. 


This hop runs from today, June 23, 2017 thru Friday, June 30, 2017 and the theme is "Summer"


For my cards I used the KaDoodle Bug Designs 
Shoptastic Cuties - Coffee Pot Cutie and used the coffee bean from the
Shoptastic Cuties - Togo Coffee Cutie set.  The card base is the same for both cards but they have different sentiments.

After I cut out the pieces for the coffee bean, feet, handle, top and bottom of the coffee pot I left the pieces on my cutting mat and then used my eBrush and various Copic markers to shade my pieces to give them dimension. 


My first card is a birthday card using a sentiment from Jaded Blossom's Coffee Break Stamp set.


Here's a close up of the cute KBD coffee pot. 


To make him more adorable I put him on an action wobble.


I'll show my second card after the follow pictures showing you a tip on how I fed my twine through the small holes in the to-go coffee cup and coffee mug created using the Jaded Blossom Coffee Dies metal die set.

I don't know about you but when I'm trying to thread twine through button holes or any other small openings I would get frustrated because the end of the twine would get frayed and wouldn't go through the hold smoothly.  So a while back when I was trying to figure out an easier way to get twine or small ribbon through button holes I thought of a sewing threader but I didn't want to take it out of my sewing kit and I didn't want to go buy one so I looked around the house to see what I had around the house that might work and I came
across some unused GUM Eez-Thru Floss Threaders that were given to my son when he had braces and thought these will work perfectly.   Below are several pictures to show you how I used the floss threader to pull the twine thru the holes in the tiny coffee mug.


Here I am pulling the twine thru the hole with the floss threader.


Easy peasy now time to pull thru the other hole.


Here's the back with the pointy part of the threader though the hole.

And here is the twine being pulled through the second hole. 


Here's the little coffee mug with the twine though both holes ready for the bow to be tied. 


Hope you liked that quick tip between pictures of my cards. 
Here are pictures of my second card. 

I put the coffee beans on the side instead of the bottom like I did on the birthday coffee card and I put one of the togo cups in his hand and next to the sentiment. 


This sentiment is also from the Jaded Blossom's Coffee Break stamp set.


Yep, he's also on an action wobble.  
This picture really shows him wobbling. 


Project Recipe:

  • KaDoodle Bug Designs Shoptastic Cuties - Coffee Pot Cutie 
    • Top, handle and bottom shaded using eBrush and Copic Marker E79 Cashew
    • Coffee piece embossed using the corner of Cuddlebug Scrollwork embossing folder and accented with Stampin' Up Early Expresso Ink
    • Tongue colored with Wink of Stella Brush GL. Pink 025
  • Coffee beans from the KaDoodle Bug Designs Shoptastic Cuties - Togo Coffee Cutie set.
    • Larger piece of the coffee bean was accented using my eBrush and Copic marker #79 Cashew and the smaller piece was accented using my eBrush and Copic markers E25 Caribe Cocoa & E19 Redwoood. 
    • After the two pieces that make up the coffee bean were glued together I accented them with a White and Metallic Brown Gelly Roll pen.
  • Card Base is called A2 Lori Whitlock Scalloped Center Step Card from the Silhouette Design Store - Design # 42687
  • Sentiments from Jaded Blossom's Coffee Break stamp set
    • Stamped with Stampin' Up Early Expresso Ink
  • Little togo coffee cup and coffee mug from Jaded Blossom's Coffee Dies
    • Colored with Copic Markers BG45 Nile Blue & BG18 Teal Blue
    • Added twine from my stash using GUM flossing threader as shown above.
Thanks for stopping by. 
I hope you liked my cards and my crafty tip. 

Please hop over to http://coffeelovingcardmakers.com for their blog line up and also go over to the KaDoodle Bug Designs blog at www.kadoodlebugdesigns.blogspot.com to check the project's my design team sisters created. 

Happy Crafting!
TTFN,
Debby


SpongeBob Sign for a Graduation

Happy Friday Crafters,

Today starts the new PDE Linky Party #178 Anything but a Card Challenge (Optional Planner Pages)

NOTE: If stopping by my blog for the Summer Loving Coffee Blog Hop, please click HERE to go directly to that post.  

For this challenge I made a SpongeBob sign for my friend who's daughter was graduating from college.  Unfortunately they don't allow signs at the graduation so they used it for a party decoration instead.   I got the SpongeBob file for free from a Facebook group.  I didn't write down which one and I downloaded it over 3 years ago so please accept my apology for not remembering which one or the crafty person who created the cut file.  Especially since I would love to give credit to the person who created it but can't.  

I made SpongeBob as large as I could to get it to cut on a 12"x12" paper, then cut out all the pieces and put him together. 


Here is a picture of how I laid it out on my Silhouette Design Studio software screen to make sure SpongeBob and the saying my friend wanted on the sign would fit on the poster board before I cut the words out.  


Here is a picture of the completed SpongeBob by himself.   
I love the way he turned out.  


Here is a picture of it all cut out and put together.  The only thing I didn't do was glue down SpongeBob and the letters because they were flying to their daughter's graduation but I laid it all out and took a picture so she would know how to put it tougher when they got to their destination. 


I was happy that I was able to make this sign to make her graduation a little extra special and thrilled when her mom let me know that she loved it. 

Well that's my project for the PDE Linky Party #178 Anything but a Card Challenge (Optional Planner Pages).   Hope you join us for this challenge by linking your project over on the PDE Linky Party blog by clicking HERE.

Thanks for stopping by.
Happy Crafting!
TTFN,
Debby 


Thursday, June 22, 2017

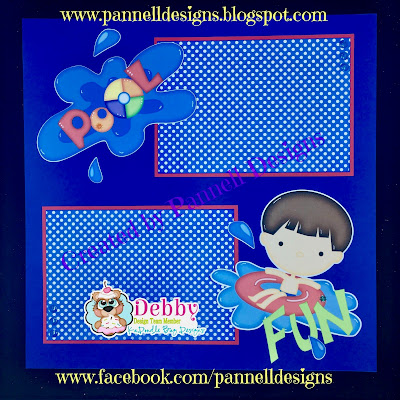
Pool Fun Scrapbook Page

Happy Wednesday Crafter's

It's my day over at the KaDoodle Bug Designs blog .... www.kadoodlebugdesigns.blogspot.com

Melissa gave the design team a challenge to use the new Pool Title, Lazy Pool Boy and/or Lazy Pool Girl files so I decided to create a quick scrapbook page using the jpgs from the Pool Title & Lazy Pool Boy files.   


Sometimes when you don't have a lot of time or you want to create something quick, using the jpg's from the KBD files is the way to go.  

I pull them into my Silhouette Software, trace them, crop away the white background and then offset it to have a small white border around the image.  After I printed them, I cut them out with my Silhouette Cameo and then accented with white Gelly Roll pen. 

Project Details:
  • KaDoodle Bug Designs Pool Title and Lazy Pool Boy files.
    • Used the jpg and printed then cut out using my Silhouette Cameo.
    • Accented with a white Gelly Roll pen
  • The word FUN created in my Silhouette Design Studio software and cut out.
  • Mats cut from paper in my craft stash. 
  • Dots on side of mats from the Dollar Tree. 
Thanks for stopping by.
Come back again on Friday for two different posts.
TTFN,
Debby 


Sunday, June 18, 2017

Father's Day Insta-Cube Card

Happy Father's Day Crafters,

I made the following Lori Whitlock Insta-Cube cards for my dad and father-in-law.

These were fun cards to make and I watched Lori's tutorial video to help me put them together. 

I used pieces two different Insta-Cube files to make these cards plus items from other SVG files.

Here they are closed.

Here's a picture on what they look like as your pulling the box out.


Once you pull them out, they pop up into a box.  So darn cute and fun.

My dad loves soccer and watching TV so on one side of the box I put a soccer ball from Miss Kate Cuttables and on another side I put a TV that I bought from the Silhouette store. 


My father-in-law goes golfing with his brother on a regular basis so I used the golf them for him


Project Details:
  • Insta-Cube Card Files used (Both purchased from the Silhouette Design Store)
    • DAD is from the Insta-Cube Card Tools - Design #198859
    • Golf pieces , box, box envelope and pieces cut from the Insta-Cube Card Golf - Design # 198850
    • Lori Whitlock Insta-Cube video tutorial can be found by clicking HERE.
  • Soccer Ball from Miss Kate Cuttables Sports Balls
  • Retro TV from Silhouette Design Store - Design #42719
Thanks for stopping by.
Happy Crafting!
TTFN,
Debby 


Friday, June 16, 2017

Flower Birthday Tag


Happy Friday Crafters,

Today starts the new PDE Linky Party #177 Tags Challenge.

If you follow my blog you know that making tags is a real challenge for me so I search Pinterest for inspiration.    I found a cute tag that had 3D flowers on it with a Happy Birthday sentiment so I tried to create one similar to it.   The watermark on the picture was Joanne Basile.  I tried to see if she had a blog that I could give credit to but couldn't find one.  So I don't know who she is but wanted to give credit to her for inspiring my tag.  

This tag ended up a little on the large size and will eventually be placed on a 6"x6" card base.  
My tag measures 5.75" x 3.814".   
I've been wanted to use the gray and yellow combo for awhile so I decided to use those two as the base of my tag and then made some teal flowers to decorate it. 

I used my eBrush to shade the flowers and a brad from my stash to finish them off.  More info about items used to create this tag below.


Project Recipe:
  • Tag from Silhouette Design Store - Design #43062
  • Flowers from Silhouette Design Store - Design #57249
  • Happy die cut with Hero Arts DC 150 Happy Stamp & Cut
  • Birthday is from Jaded Blossom Supersized Birthday Greetings where I cut one of the Happy Birthday's so I can stamp separately when I want to.  
    • Stamped "Birthday" with Versa Mark ink and heat embossed with Sparkle N Sprinkle Black Detail Embossing Powder. 
Hope you join us in this weeks #177 Tag Challenge. Link your tag over at the PDE Linky Party blog by clicking  HERE

Thanks for stopping by.
Happy Crafting!
TTFN,
Debby 


Wednesday, June 14, 2017

Under the Sea Mermaid Birthday Card

Hello Crafters,

Today is my day over on the KaDoodle Bug Designs Blog and I'm also sharing the card I made here on my blog. 

This card was a real labor of love.   I had a friend ask me how long does it take you to make a card.  Of course it all depends on how detailed you get and how many paper pieces you put together for a card.  So I kinda tried to keep track on how long it took me to make this card and I estimated that it took me approximately 6-1/2 to 7 hours to make from concept, to designing on the computer to cutting out and putting all together.  

When I saw the newly released KaDoodle Bug Designs Pretty Little Mermaid and Cutesy Mermaid Friends files I knew they would be perfect to make a card similar to one I saw in Pinterest that was created by Frances Bryne that I thought was awesome.  (Sorry no link to her blog but I want to give her credit to her for inspiring my card.)  Here's a picture of her card and my inspiration:  


The base of my card is called a x-card and I modified a file I purchased on the Silhouette Design Store to create it. 

Here's a picture of my modified panels and the orignal panels.  Not only did I changed it from a circle to an oval, I also enlarged it from an A2 to a bit larger. 

Ready for a bunch of picture of my card?  
Here you go...

Showing you how I stamped the face on her.

Here she is temporarily put together and placed in my mini MISTI.

Soon you will see why I love my MISI. 
The first press was a little light so because the stamp stays in place and I have my mermaid taped down I can re-ink the face stamp and stamp it again to get it darker.   See next picture.


Here is the face stamped the second time.  See perfection!  
Very hard to do that without the MISTI.

Now onto the card.

Front of card.  
I just love how she looks swimming with the dolphin and that she looks like she's under the sea.   Used fishing line taped between two bases of the mermaid to have her float in the center of the oval.

Here's a close up of the Mermaid & Dolphin 

Here's a close up of the sign with the sentiment stamped and heat embossed to make it stand out more. 


Here's the right side of the card with the little crab.  
Thought it would be fun to make him blue instead of the normal red. 

Here's a close up of the little crab.  


Here's the left side of the card with the seahorse.  

Here's a close up of the seahorse.  


And for the last photo is the back of the card.  No creatures just seaweed, coral and a cute little shell. 


Card Recipe:
  • Card Base Modified A2 X-Card Mason Jar file purchased on the Silhouette Design Store - Design #169810
    • Modified by un-grouping and releasing the compound path of the panels, removing the circles and creating an oval and centering it in the middle of the panel.   I then removed the extra score lines.  
    • New modified panel sizes are 6.875" H x 5.312" W, smaller mat is 6.592" H x 5.00" W
  • KaDoodle Bug Designs Pretty Little Mermaid and Cutesy Mermaid Friends 
    • Mermaid from the Pretty Little Mermaid file.
      • Cut the following pieces twice:
        • Her base, back of her hair, her bottom and fins.
        • Can't see it but her fins, bottom and top were brushed with Wink of Stella Brush Clear on both sides.
        • The edges of her bow were inked with Stampin' Up Lavender Lace ink.
      • Used Peachy Keen Stamps Princess Face Assortment (PK-640).  Face was from the 3/4" row for this set. 
    • Dolphin, crab, seahorse, seaweed, coral and shells all cut from the Cutesy Mermaid Friends.  
      • Dolpin inked with Stampin Up White ink and googley eye from my stash.
      • Crab & Seahorse accented with a white Gelly Roll pen and googley eyes from my stash.
      • Coral accented with Comic markers B24 Sky, RV19 Red Violet in my eBrush and white and Fl. Vermilion Gelly Roll pens
      • Seaweed accented with Copic marker BG18 Teal Blue in my eBrush and then lines drawn with Comic Marker.
        • Seaweed were cut at three different sizes. 
  • Sign from KaDoodle Bug Designs Frosty Friends modified to 1.288" H x 2.709" W to fit the sentiment. 
    • I used a Tim Holtz wood grain stencil and Tim Holtz Distress Ink Tea Die to make the sign and post to look like wood. 
  • Sentiment from Jaded Blossom Mermaid Kisses stamp set
    • Using my MISTI I stamped the sentiment onto the brown sign with Versa Mark ink and heat embossed with Sparkle N Sprinkle Embossing Powder Black Detail.  Then I put it back in the MISTI and stamped again with Versa Mark ink and heat embossed with Sparkle N Sprinkle Embossing Powder Ice.   
      • I found that embossing with the Black embossing powder first helped make the Ice embossing powder be more vibrant and easier to read on the dark brown paper. 
  • Sand was created by using Jaded Blossom Tropical Dies.

Sorry for the long post.   Lots of detail went into making this card and wanted to share all those details with you. 

I hope you like my spin on the x-card inspired by a card I saw on Pinterest.

Happy Crafting!
TTFN,
Debby

PS.  Entered this card in the Pink and Main Challenge #22-Summer Theme: https://pinkandmainchallenges.blogspot.com/2017/06/challenge-22.html