Friday, December 30, 2016

PDE Linky Party #153 - Anything Goes


Happy Friday Crafters,

Today starts a new PDE Linky Party Challenge    


This week it's to make any project.  Can be whatever creation you make.

For those of you that know me or have followed my Facebook and Blog the past year or so, you know that every Christmas I try to come up with something creative to give money to my nieces, nephews and godchildren.   So today for the "Anything Goes" challenge I'm sharing with you what I made for them this year.   My nieces and nephews really got a kick out of them.   My godchildren won't get them until tomorrow so I'm hoping they don't see this blog post. :)

This year I decided make pizza out of money for their gift.   

Saw this idea on Pinterest but of course I had to make my own pizza box and add my own personal touch to them.   

This is the picture I saw on Pinterest that gave me the inspiration for my Christmas gift idea. 


 These are the front of my pizza boxes.


The boy's got the Pizza Box with the Boy Elf


The girl's got the Pizza Box with the Girl Elf


When they opened it, this is what they saw.

I had to fold the money to look like pizza slices with pizza crust and used a few pennies for pepperoni toppings.

A big thank you to my hubby for folding a majority of these bills for eleven pizza boxes.  


Pizza Box Recipe:
  • Pizza Box from Silhouette Design Store - Design ID # 61145
  • Pizza Box was printed with snowflake digi paper from Little Scraps of Heaven Cozy Sweater Penguin digi kit
  • Pattern Paper used for half circles are from the Prettygrafik PS643 Ginger Snap digital paper pack. 
  • Plaid paper behind half circles is from the Prettygrafik PS524 Bake Sale Treats digital paper pack. 
  • Boy & Girl Peeking Elves are from Miss Kate Cuttables.   I used the jpg and used my Silhouette Cameo's print and cut feature. 
    • Click HERE for Boy Elf.   
    • Click HERE for Girl Elf. 
  • The tag under their hand is from the Silhouette Design Store - Design ID #52794.   
    • I used a digi paper to fill in the tag and then added the "Pannell Christmas Pizza, Made with Fresh Dough" and once again used the Silhouette Cameo's print and cut feature.  
Thanks for stopping by.  
I hope you liked my take on the pizza box money gift idea.  
Feel free to use this idea to create your own money pizza box.  If you do, I would appreciate it if you would mention my blog as your inspiration.   Thank you.

Hope you join our PDE Linky Party for week's "Anything Goes" Challenge.   
Go HERE to check out the rules and to link up your project.  
Can't wait to see your creations.

Happy Crafting!
TTFN,

Debby


Friday, December 23, 2016

PDE Linky Party #152 - NO Cards

Happy Friday Crafters,


I'm excited to post my first project as a PDE Linky Party Design Team member.     

This week it's to make any project that isn't a card.   
Now this type of challenge is kinda difficult for me because I tend to gravitate towards always making cards. 

Lucky for me this NO Card Challenge is close to Christmas so I took the opportunity to make Christmas treat bags for some of my co-workers who have a good sense of humor.   
Handed them out at our company Christmas lunch a week ago and they loved them.    


RECIPE:
Thanks for stopping by.
Hope you join our PDE Linky Party for this "NO" Card Challenge.   
Go HERE to check out the rules and to link up your project.  
Can't wait to see your "NO" Card creations.

Happy Crafting!
TTFN,
Debby


Thursday, December 8, 2016

My Newly Painted & Designed Purple and White Craft Room

Hello My Fellow Crafters,

Sorry I haven't posted since March.   It's been a weird year for me.

I really got bummed when Scrappy Moms Stamps closed down their shop and stopped selling stamp sets.   Then I was busy helping out with my godson's wedding.  After his wedding I decided I needed to gut my craft room, paint it, get new work surfaces and storage so I could have everything organized because it was a complete disaster.   It was so bad that I was referring to it as the hoarders room.   I couldn't find craft items when I needed them so it was driving me crazy.    It took me almost four months from start to finish but it was so worth it.   Lucky for me I have a hubby that supports my crafting addiction and allowed me to take over the garage and part of the living room with everything that came out of the room.  He helped me paint and helped put together all the Ikea drawers and shelf.   He was also super patient while I went through everything to determine if I was going to keep or get rid of it and where I wanted to put it in the craft room. 

I love my clean, organized craft room and I'm looking forward to getting back to crafting and posting on my blog in 2017.

Here are a bunch of pictures of my room and my drawers all organized with the same items.  No more having glitter in 4 different places, paper in 5 different places, ribbon where I couldn't find what I was looking for, etc.  Of course I had to paint the walls purple.  The color is called Zinfandel.

The work surfaces, Storage drawers and cube shelf are from Ikea.


These three drawer units are from Ikea.  The two shelves on top of them are from Michaels.

Here is what in some of those drawers:
All my glitter and flocking powder together in one place.  

All my embossing powders together. 

A majority of my flower embelishments.

My glitter glue and Crystal Drops.

Sequins...

Disney goodies.


The storage items holding my ink pads are from Stamp N Storage and are called "Ink Pad & Refill Holder".   The circle cut outs are suppose to be for re-inkers but I'm using them to hold the triangle makeup sponges I use to ink edges.   That way it's always next to the ink pad and I don't have to go looking for it.   The smaller storage unit above them is also from Stamp N Storage and stores my flat punches.   It's called Lock-Down Punch Holder.


The two bottom storage units are from Micahel's.   The two pen holders are from Stamp N Storage. These are the Side by Side Marker Holders

On the other side of my work space I have another pen holder from Stamp N Storage where I place my odd tools, small scissors, Wink of Stella pens and punches.  This one is called the Stacked Marker Holder.

This is my work space.   This is the cleanest it will ever be.  LOL

My Shot Box so I can take pictures of my projects and my CutterPillar Pro cutting board.

Storage under my Craft table.   

Here are pictures below are what's in the wider drawers.

All my chalks, and pom poms for chalking all in one spot. 

All my small ink pads in one spot.  Yeah!

Misc markers that didn't have room for in the Stamp N Storage marker storage units.

All my glue dots, pop up dots and score tape in one spot.

Sizzix thin dies and embossing folders I decided to keep.


This is what is in the smaller drawer unit:
My acrylic blocks, erasers, lighters, and other mix stuff.

My double sided tape, tape and baby wipes. 

My Scrappy Mom Stamps.

More Scrappy Mom Stamps and The Stamps of Life items from their Card Kit Club.

Stamps from various artists. 

More The Stamps of Life Stamp sets. 


My wall of paper, paper stacks, envelops, embossing folders, etc.  
This unit has 20 cubes perfect for holding 12"x12" paper and crafty times is from Ikea.


The tall drawer unit is from Ikea and hold my paper scraps, all organized by color. 
The three units stacked on top of each other next to it are from Michaels.
On the wall above that are two ribbon shelves from Stamp N Storage. 

Another angle


Here is my kitty Seren checking out the new crafting digs.  


Under the table that holds my Silhouette and Big Shot I have another Ikea drawer unit and here is what is in those drawers....
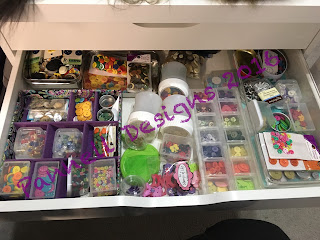
Buttons, buttons and more buttons all in one spot. 
Love being able to open one drawer to see all the buttons I have when working on a project.

This drawer has my loose bling, eyes, and other embellishment goodies.

This drawer has all my brads and eyelets. 

Smaller paper cutters, my eyelet setter, ruler and envelope maker are stored here.

My small glue gun and extra blue sticks and other crafting tools stored here. 


Thank you for stopping by.  Looking forward to sharing more with you in 2017.

I hope my new craft room inspires you and helps with ideas for organizing your craft items.

Happy Crafting!
TTFN
Debby

Links to Items I purchased from Stamp N Storage:
NOTE:  We painted all of the Stamp N Storage items white.  
Links to some of the items I purchased from Ikea