Friday, January 27, 2017

PDE Linky Party ~ #157 Anything but a Card Challenge

Happy Friday Crafters,

It's Friday time for the PDE Linky Party, #157 Anything but a Card challenge.


My Stampin' Up January 2017 Paper Pumpkin kit that arrived just in time for this challenge.

I was planning on making some valentine goodies and this kit had almost everything I needed to accomplish that task.  Of course I had to embellishment them with some cute valentine print and cut images from some of my favorite companies I like to get my SVG files from. 

Here they are.   
I didn't use the gold thread in the kit because it was too thin for me so I grabbed some gold embroidery floss from my stash and used that instead to add bows to the bags. 
I put two delicious Ghirardelli Squares in each bag for a sweet Valentine treat. 


I didn't like the way the back looked so I decided to use the heart stamped with one of the sentiments from the Paper Pumpkin kit to hide it.   Just used my ATG Gun to add adhesive to the heart and placed them to cover the back. 
Note:  Instead of using the square Calypso Coral ink pad included in the kit, I chose to use my Stampin' Up Regal Rose stamp pad to stamp the heart outline and sentiment.

Here a close up of the one with the Kitty holding a heart.  This image is from Miss Kate Cuttables Cute Valentine Kitty.  


Here a close up of the one with the adorable Love Bug.  This image is from Treasure Box Designs Stuffy Pals Love Bug

Here a close up of the one with the sweet bear with heart bee wings holding a honey pot.  This image is from KaDoodle Bug Designs Cutie KaToodles Honey Bear.


Project Recipe:
Thanks for stopping by.  
Hope you join us over at PDE Linky Party blog for this challenge.
Happy Crafting!
TTFN,
Debby


Monday, January 23, 2017

Star Wars BB-8 Birthday Card made using Craftwell's eBrush


Hello Crafters,

I'm excited to be a guest designer for eBrush Craftwell. 

Today I'm sharing a card I made with the cute Star Wars BB-8.   

I cut all the pieces to create the BB-8 with my Silhouette Cameo.  

When I cut the white portion of my BB-8 I felt it was way to bright and I immediately reached for my eBrush to help me dirty him up a bit so he would look like he has been running across the desert sands on the planet Jakku.   
I used various brown and gray Spectrum Noir pens in my eBrush to give him that dirty look before I removed them from my cutting mat.   
I loved how the eBrush with the different brown and gray inks totally gave me the look I was going for so of course I used eBrush with the same pens to dirty up his accent pieces as well.   
Couldn't have made him look this good without the eBrush. 

I also use the eBrush to distress the space piece I stamped my sentiment on. 
Here is a picture of my finished card.


I put the BB-8 image on an Action Wobble to make him move in space. 
I lightened the picture so you could see the detail of the background paper I embossed with Sheena Distress Splatter embossing folder.


I changed it up a bit for another card.  Added a different ribbon and placed it on the other side of the card.

Card Recipe:
  • Card Base 5-3/4" x 5-3/4"
  • Mat 5-1/2" x 5-1/2"
  • BB-8 is from SVG Cutting Files "May the 4th Be With you Blog Hop" from 2015
    • Sorry this cut file was only available during their special blog hop.
  • Sentiment is from Jaded Blossom -Robotistic Stamp set
    • Sentiment stamped on a Paint Splat from KaDoodle Bug Designs My Little Artist set.  I chose it because it look like something that would be in space.
  • Mat was embossed with Sheena D Stress Splatter embossing folder in two sections.   I placed a ribbon to cover the seam.
  • BB-8 was placed on an Action Wobble.
A big thank you to Craftwell for allowing me to be a guest designer.
It has been such an honor to share how fun and awesome  
it is to use the eBrush to accent your paper pieces to make them pop.

Thanks for stopping by.
Happy Crafting!
TTFN
Debby

Friday, January 20, 2017

PDE Linky Party ~ #156 Tags Challenge

Happy Friday Crafters,

It's the 3rd Friday of the month and time for the PDE Linky Party, #156 Tags challenge.


If you follow my blog or Facebook page you know that 99%of my paper crafting projects are cards because that’s my comfort zone.  
So having to create a tag is a challenge for me, especially when I like to create paper projects that I know I’ll use or give away.

For my first tag challenge as a PDE Linky Party Design Team member I decided to really challenge myself and made a ice skate tag that I purchased a few months back from the Silhouette Design store.  

I cut the various pieces out on my Silhouette Cameo and then pieced them together.

Here are some print shots of my Silhouette software screens.

This shot is what the file looks like when it's first opened.
I like to do a screen shot of the picture and add it to my working file so I know what the image looks like. 

I ungrouped them and then moved all the pieces off the mat except the base of the ice skates, filled it in with black and then filled the page.


After I cut the base of the ice skate out in black I moved them off the mat on the screen and then moved the front of the skate on to it, made it white and then filled the page and cut out using white paper. 


On the back of the skate, I added “To” and “From” in my Silhouette Studio Designer Edition software.  
I filled the words in with black, changed the line color to black and changed them to “no cut” because I didn’t want the words to cut out.   I then sized them and placed them in position on the white back piece of the ice skate and grouped them together.  I then copied and pasted to add more of them on my design page before I printed them out on my printer. 
On the same sheet that I added the back of the ice skate with the “To”/”From” I added the jpg from Miss Kates Cuttables Christmas Bow to use as an accent on the Ice Skate Tag.

When I use jpg’s I pull the jpg into my Silhouette software and do the trace feature on it to get rid of the white background.   (NOTE:  watch Tracing without Tears on YouTube for awesome tutorials on how to trace jpg’s or other images in the Silhouette software.)  
After I got the Christmas Bow traced and cropped I used the offset feature to have a small white border around the picture.  I then set that border to cut edge and then group the image and the border together.  

Here’s what my software screen looked like before I printed.

After I printed this page out, I put it on my cutting mat to cut the images out on my Cameo.  NOTE:  see the red lines, that is what is going to cut.  If you don’t see red lines or see red lines where you don’t want to cut you need to fix that before you cut.  Trust me, there have been time where I didn’t take a close look and didn’t realize that I didn’t remove the cut feature off the words and it messed up my whole page and had to redo it.  

On the blades for this ice skate tag, I copied and then flipped horizontally so that I would have the silver blades on the front and back of the tag.  Felt it completed it better.
Here is a print shot so you can see what I did. 
  
After I glued all the pieces together and before I added the Miss Kate Cuttables Christmas Bow and glitter glue on the blades I took thin white ribbon from my stash and laced the ice skate boots.  This was a trial and error process since I didn’t have the two sides like you do when lacing shoes.   But I finally figured it out.   Sorry I don’t have any pictures of that process but you can see on the final pictures how I laced them. 

Once I got the laces done I added the Miss Kate Cuttables Christmas Bow that I printed and cut earlier and then I added iridescent glitter glue to the bottom of the blades to make them look like they had ice build up on them from skating on the pond and set aside to dry.

Here is the front of my finished ice skate tag. 


Here is the back of my finished ice skate tag. 


Project Recipe:
  • Ice Skate Gift Tag from the Silhouette Design Store - Design ID# 163495
  • Christmas Bow is from Miss Kate Cuttables
    • I used Clear Wink of Stella glitter brush pen to add sparkle to the red portion of the bow.
  • White ribbon from my craft stash
  • Iridescent glitter glue used on edge of ice skate blades.

Thanks for stopping by.   
Hope you join us in this challenge.   Go over to the PDE Linky Party Blog by clicking HERE to link up your project. 

Happy Crafting.
TTFN,
Debby

Friday, January 13, 2017

PDE Linky Party ~ #155 Cards Challenge

Happy Friday Crafters,

Today is the 2nd Friday in January and therefore time for the PDE Linky Party, #154 Cards or Project Life Cards challenge.


I'm excited to share with you a card I made for my son's birthday.  
He loves music and loves playing the guitar so when I saw this guitar card in the Silhouette store I knew I had to buy it for his birthday card. 

Here are various pictures I took of my finished card. 

I took this picture at an angle because I wanted you to see the shine of the liquid glass I put all over the pattern paper to make it look more like an electric guitar that you would see in the guitar store. 


Here  is a close up on the guitar pick, made out of paper, and the guitar strings made out of teal wire.


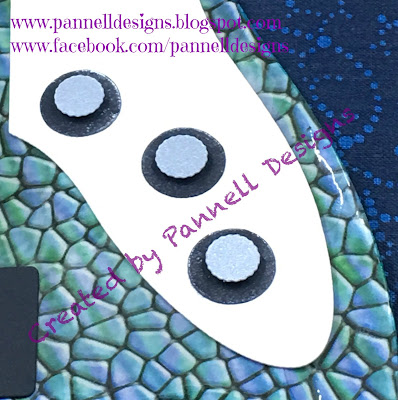
Here is a picture of the knobs.  
I took my silver ink pad and inked around the edges of the black circles.
I used pop up dots to pop up the silver part of the knobs to give them dimension.  


Card Recipe:
  • Guitar Card from the Silhouette Store - Design ID #58054
  • Guitar background was cut out of Papper Pizazz HOTP-20169 Blue/Green Mosaics paper and covered with Close to My Heart Liquid Glass.
    • I let the liquid glass dry for over 24 hours before I put the card together. 
  • Guitar Pick tracked from one of my son's guitar pics which I fussy cut.  After I cut it out I stamped with "Happy Birthday" from the Stamps of Life minitags2cut stamp set with my Versa Mark stamp pad and then embossed with Sparkle N Sprinkles White Detail Embossing Power
  • Wire from my stash.


Thanks for stopping by and looking at my latest card.   
Hope you take time to join us for this challenge.   
Click HERE for details and to link any project you make for the 
#154 Cards or Project Life Cards challenge.

Happy Crafting!
TTFN,
Debby


Friday, January 6, 2017

PDE Linky Party #154 - Anything Goes Challenge

Happy Friday Crafters

Are you ready for the first PDE Linky Party Challenge of 2017?

This week's challenge is Anything Goes.  How fun is that?  
You can create anything you wish and join this challenge. 

I love the Anything Goes challenges because it gives me the opportunity to share a card that I've made since that's what I love to create. 

For this challenge I'm sharing a birthday card for a little girl that was turning one.   The theme for her birthday party was Dr. Seuss Oh the Places You Go so I had to create a birthday card that went along with the theme. :)

Here is my card.


Card Recipe:
Thanks for stopping by.   

Hope you join us for this challenge over at the PDE Linky Party blog.   Click HERE to go to the PDE Linky Party blog for more details regarding this challenge or to link up your project over there. 

Happy Crafting!
TTFN,
Debby